|
The Picture Perfect Garden Fence
The Perfect Winter Project
Michael Hillman
Master Gardener Spouse
A few years my Master Gardener wife asked if I would build her a white
picket fence for her garden. Having both come from New England I knew exactly what she wanted ... and it wasn't one of those prefabricated picket fences you see everywhere.
It was the perfect winter project for me.
While the thought of making hundreds of pickets might seem daunting to some, if you approach the project in a step-by-step fashion this
challenging project can easily be accomplished by even the most novice of woodworkers. All you need is access to table saw and a drill press!
Before we begin, a few fence basics: a fence is broken into 'sections' of equal length, with each section containing the same number of
pickets. Each section is held in place by posts. While each picket is the same width, you can vary their length to create your own unique pattern.
 The first thing you'll need to do is figure out how many 'sections' you'll
need. Make sure your Master Gardener spouse has thought through the route of the fence. While a simple enclosure fence is easiest, running a fence through the middle of a
garden, creating an 'inside the fence garden' and an 'outside garden' makes a small garden look big and a big garden look royal! The first thing you'll need to do is figure out how many 'sections' you'll
need. Make sure your Master Gardener spouse has thought through the route of the fence. While a simple enclosure fence is easiest, running a fence through the middle of a
garden, creating an 'inside the fence garden' and an 'outside garden' makes a small garden look big and a big garden look royal!
Once you've mapped out the route of the fence, calculate the number of 'sections' you'll need with each section spanning 8 feet. Remember to
factor in any gates and shortcuts to compost bins!
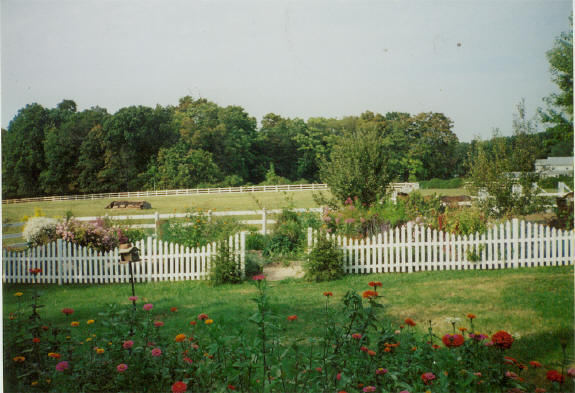
Next comes one the most important decisions you'll have to make: select the 'pattern' of the pickets in the fence. A classic New England
garden fence has the pickets arranged in an arch, meaning each picket increase in height from the center of the section to the supporting post. In my fence the picket in the
center is 31½ tall, the ones on either side of it are 1½ taller, or 33 inches, the ones next to them are 1½ taller, etc. Since you're making all the pickets from scratch you
might as well make your fence design unique, just like the garden it will decorate.
A pleasant looking width for a picket is 2¾ inches, which just so happens to be what you get when you rip (cut down the middle length wise) a
1x6 board. I recommend you steer away from pressure treated wood for the pickets as they'll warp and twist while you wait for them to dry enough to paint. Instead use #2
Knotty pine 1x6 boards for the pickets. Properly painted they will last for years and are much easer to work with. You can get them at almost any hardware store. Don't buy #1
grade boards as they are ridiculously expensive.
Next on the agenda is figuring out how many pickets you'll need. Pickets should be separated by the width of a picket. Which means in a
standard 8 foot fence section there will be 16 pickets. Multiply the number of sections you want by 16 and you'll get the number of pickets you'll need. Depending upon your
design you'll need 6 or 8 foot length boards to make your pickets. In my case my design allowed me to make four pickets out of a single six-foot 1x6 board (e.g., two 39 inch
pickets and two 33 inch pickets, or two 37½ inch pickets and two 34½ inch pickets). A good rule of thumb is you'll need 3 1x6 boards for each section. At $3 a board, the cost
of all the wood for my fence was less then half the cost of a generic prefabricated picket fence.
Now comes the fun part, making your pickets.
Once you got all your boards, cut them to length, then 'rip' them in half. As you 'rip' the boards, keep the two halves together. When you're
done, you should have multiple stacks of boards, one for each picket length.
Next cut the top of each picket at a 30-degree angle to make the 'point' of the picket. A 30-degree cut gives a more 'regal' look to a
picket, but a 45-degree point works just as well. Remember to re-stack the halves together after cutting the points.
Classic New England fence pickets have a half circle cutout on both sides just below the point of the picket, like 'spade' design in a deck
of cards. To cut the half circles you'll need a 'frame' to hold the boards still. A simple 'frame' can be made from a scrap of 1x8 pine board the length of your longest
picket and two 1-inch wide boards. Center two pickets side-by-side on the board and then nail the 1 inch boards on either side so they snugly press the two pickets together,
but not too snug that you can't remove the pickets from the frame. Cut a short board to form the top of the frame. Now if you've managed to keep your boards pared up through
the prior cutting steps, (something I failed to do) every set of picket will fit perfectly in the 'frame' even if pickets in a pair are slightly different in width.
To cut the holes I recommend a 1½ inch Fostner bit. While a paddle bit will do, a Fostner bit will give you a cleaner hole. With a set of
pickets in the frame, center the bit between the two pickets about four inches below the point of the pickets and clamp the frame in place. When you cut the hole half of it
will be in each picket, forming two symmetrical half circle cutouts. After you cut the first half hole, reverse the pickets so the uncut side is again in the center and cut
the second hole. With your frame secured in place, you'll find cutting the half-holes in the pickets will be done in short order.
Once all pickets are cut, double prime them with a good exterior grade latex primer, then double coat them with good exterior grade latex
glossy paint. Given all the work you've done I can't emphases enough not to go cheap on the quality of paint. The better the paint, the longer the pickets will last! And make
sure you coat every part of the picket, including the bottom! Pine will quickly rot when exposed to the elements unless it is well painted.
Next on the agenda are the cross members that the pickets will be nailed to. In this case a pressure treated 2x4 works well. If you have
access to a router I recommend rounding the edges on the side opposite where the pickets will be nailed. This will help prevent water buildup on the cross members, reduce the
potential for rot, not to mention the fact that a rounded edge gives a more polished look to the fence.
After the cross members are primed and painted, lay them out on a table separated by at least 18 inches, then lay your pickets on them. The
bottom of each picket should be at least 4 inches below the bottom of the lower cross member. The top of the cross member should 4 inches below the bottom of the half circle
on the shortest picket. To make spacing the pickets easy, cut scrap pickets into 3 inch lengths and use them for spacers. Once all the pickets are in place, secure them to
the cross member by a single galvanized nail. Do not double nail, screw, or glue them! A single nail will hold them securely in place and will allow you to easily replace
them if they should ever be damaged.
Now it's time to set your posts. As the post will be in contact with the ground, 4x4 pressure treated posts are a must. If you have a router,
round the edges on the post before you set them for a more polished look. Post should be sunk at least 24 inches, 36 inches is optimal. All posts should be sunk 8 feet center
to center, and sunk vertically true, not vertical to the slope of the ground. Don't cut the tops of the posts until you've installed the picket sections! (Note, as the posts
are 8 feet center to center, that means each picket section will be 7 feet, 9 inches, so lay our your pickets accordingly.)
Once all the posts are in place, run a string line from post to post along the path of the fence. The purpose of the string line is to allow
you to gradually adjust the height to account for any changes in the contour of the ground. In doing so, you'll prevent your fence from looking like it was put in by a
drunken sailor! If you got a short 'hump' in the ground consider trimming the bottom of the pickets to account for it. This will help keep the profile of the top of the fence
as straight as possible.
Now comes the tricky part. All pickets should be pointed vertically, just like the posts, no matter what the slope of the ground under them.
To adjust the angle of the pickets so they are vertical simply place the section you are about to install on the ground and push on the top of the end picket, this will cause
all the pickets to shift their angle relative to the cross member.
Once you've got the pickets aligned vertically, place the section next to the post in line with the string line, mark and cut off any excess
length at the end of the cross member and toe-nail the section in place. Pre-drill all nail holes to prevent the ends of the cross members from splitting. Caulk the ends of
the cross members to seal any gaps.
Once all the sections are in place, run a string line from post to post approximately 4 inches above the top of the tallest picket, this will
mark the top of you posts. Again, if you have a router, round the edges of the tops of the post after you cut them for a more polished look.
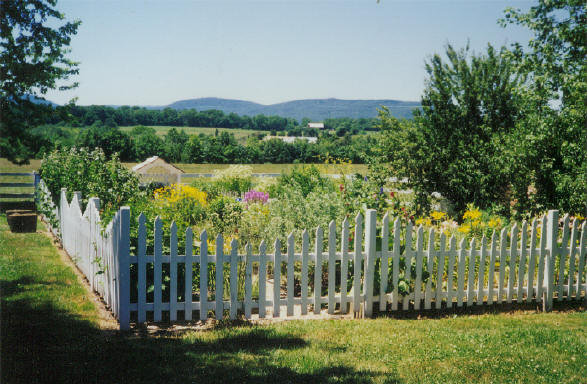
Next sit back, admire the view, and enjoy the accolades that will flow from everyone who sees your picture perfect garden fence!
Read
other stories by Michael Hillman
Other gardening related articles by Michael Hillman
|