Janet Larkin
Frederick County Master Gardener Program
Gardening is a great hobby not only for those with bottomless pockets but also for those who don't want to spend hard earned cash on things they can get for free! The main difference will be that the less money you spend, the more patience you will
have to have and the more willing you must be to get your hands dirty. But you said you liked gardening, so patience and dirty hands are a requirement!
First of all there are many ways to get plant material other than by buying container grown plants at a nursery. Most plants can be started from seed or propagated from cuttings. You can buy seeds of most flowers and vegetables from a catalog or
store but you can also collect seeds on your own. Seeds can be gathered from your own garden or ask a neighbor who has a plant you admire or even collect seed in public gardens.
It is best to ask permission before taking a cutting or collecting seeds but most people will gladly comply. It helps to be familiar with the plant you are attempting to grow. You must be able to recognize the seed and know when it is ready to be
harvested. In general, named cultivars and hybrids will not come true from seed but will have characteristics of the plants that were mixed to produce them or characteristics of another plant in the garden that pollinated these seeds. Most of the progeny will be inferior to
the parent but on the other hand some may be better! Non-named varieties grown from seed should look the same as the parent.
So how do you plant the seeds you have collected?
1. Start seeds in a soilless mix to prevent disease from killing young plants. You can mix your own less expensively than by buying the prepared mix if you need large quantities. A good mix is 1/3 peat moss, 1/3 perlite , 1/3 vermiculite. Seeds can
be started in small pots or special planting trays but basically any container will do. You can reuse some recycling containers or use small plastic or paper cups with a hole punched in the bottom for drainage. Don't try to save money by using regular garden soil to start
seeds. I've learned this the hard way!
2. The soilless mix should be thoroughly moistened before the containers are filled and the seeds should be covered with soil to a depth 2 to 3 times the diameter of the seeds. A kitchen strainer or flour sifter can be used to get a fine coating over
the seeds. A mister can be used to moisten the growing medium without washing away small seeds.
3. After the seeds sprout they can be placed in a south facing window or under an ordinary florescent fixture. You don't need to buy a special lamp or bulb, but be sure the light is very close to the plants, 3 inches away from the foliage.
4. Once the seedlings have developed their second set of true leaves feed them with a half strength fertilizer every week. Fertilizer is important because there are no nutrients in a soilless mix. Some people like to repot the seedlings into a mix
with hummus at this point instead of fertilizing.
5. Harden off your seedlings by putting them in a sheltered spot in the shade for a gradually longer period each day before planting them outside full time.
People are quite familiar with starting seeds of flowers and vegetables but even seeds of trees and shrubs can be collected. Many native trees and shrubs are difficult to find in nurseries but seeds are plentiful in local woods or in your yard. Most
large tree seeds lose their vitality if they are allowed to become completely dry so things like Oak, Walnut, Maple, Willow, Ash, or Poplar must be sown in the open ground as soon as they are available. Seeds with fleshy coverings such as Apple, Cotoneaster, Barberry,
Dogwood, Holly, and Rose should have the pulp removed before they are planted. This can be done by soaking the berries in water for a few days until the covering is soft and easy to remove. Spores of ferns can also be collected from the undersides of the leaves when the
spore cases begin to split open.
You can also generate new plants by taking cuttings of plants and rooting them. In general plants propagated from cuttings will reproduce the parent plant exactly. Cuttings should be kept moist and the dipped in a rooting hormone such as Rootone then
placed in moist sand or a mix of vermiculite and peat moss. The mix should be kept moist and is best accomplished by putting the whole pot and plant in a plastic bag and sealing it. Cuttings can be taken from most houseplants and will root relatively quickly (6 weeks).
Cuttings can also be taken from shrubs and trees. It is best to take softwood, new growth during May or June, after flowers have bloomed. Some plants root more easily than others or benefit from a particular treatment so you might want to take a book out of the library on
propagation. You can generate any number of plants by taking small cuttings and having the patience to see them through to mature plants. It is a great way to start a hedge or border where you need a lot of the same type of plant.
|
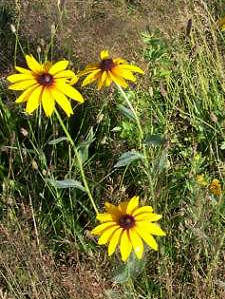
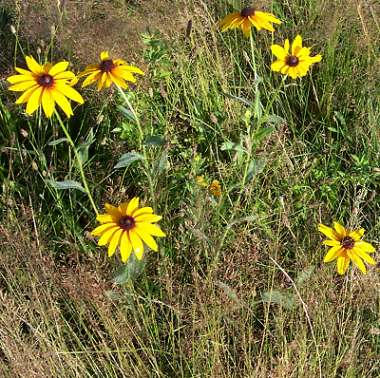
Black-eyed Susan
Rudbeckia hirta |
Another source of free plants is your own garden beds. If you learn to recognize your plants you will realize that many "weeds" are actually self-sown plants that have moved to a new spot in your yard. Instead of pulling them up and composting them
or spraying them with an herbicide, why not dig them up and plant them where you can enjoy them. In my yard I find self-sown violas, allysum, black-eyed susans, hollyhocks, yarrow, four o'clocks and even trees such as crab apples, maples, oaks, catalpa, locust, and holly.
Last, but not least, plants can be attained through the old bartering system. When you are dividing perennials you can trade with a friend or a garden club. There is at least one seed and plant exchange on the internet at www.gardenweb.com. Plants
and seeds that you have or want are posted for exchange.
There are other ways to save money when gardening. Instead of purchasing an expensive soil conditioner why not start composting? You do not need to purchase an expensive bin. You can build an enclosure out of free wooden pallets, wire, or straw
bales. You do not actually need an enclosure at all. For those of you who are really lazy, and really cheap, (like me) you can just throw composting material on a pile and let it sit for a long time. In about a year, with no turning and no complicated formulas for green and
brown material, you with have a beautiful, rich soil amendment. I like to have a few piles going at once, one for adding to and one for taking from. If you don't have room to hide some ugly piles you can use regular garbage cans as compost bins.
Another source of mulch or compost is the local landfill or recycling center. Most of the time they have some combination of the two that is free for the taking. You will have to load your own into a truck or use large plastic bags for smaller
amounts.
For those of you with a strong back and a desire for a fieldstone retaining wall or border check out all the new construction sites in the area. Most love to have you take rocks because they have to pay to have it hauled away. Always ask just to be
safe. Sometimes you can even find old brick where buildings are being demolished that is free if you load and haul it.
So, now you have no excuses, with a little patience and hard work you can have a garden to rival any bought at a store.
Read other articles on garden and landscape design
Read other articles on gardening techniques